Overview
When this website was first created, my project write-ups and blog posts were powered by markdown files stored directly in the website source code.
This meant that, each time I needed to make a writing edit, no matter how small 🤏, I had to:
- Open my code editor
- Make the edits
- Preview the edits locally
- Commit the code changes (either usually via PR)
- Wait patiently for Vercel to redeploy my site to the web

This workflow disrespects the core essence of the writing process... which thrives on rapid iteration and continual refinement. Furthermore, as much as I enjoy VSCode, creative writing directly from a markdown file is quite a meh experience; it's much cooler to use a sleek user interface like Medium or Notion... which both support markdown previews, drafts, comments, and spell-check right OOTB.
To modernize my process, I integrated my website with a headless CMS.
What's a CMS?
For those who are unfamiliar, a Content Management System (CMS) is a software app that enables the creation, management, and publication of digital content to a website.
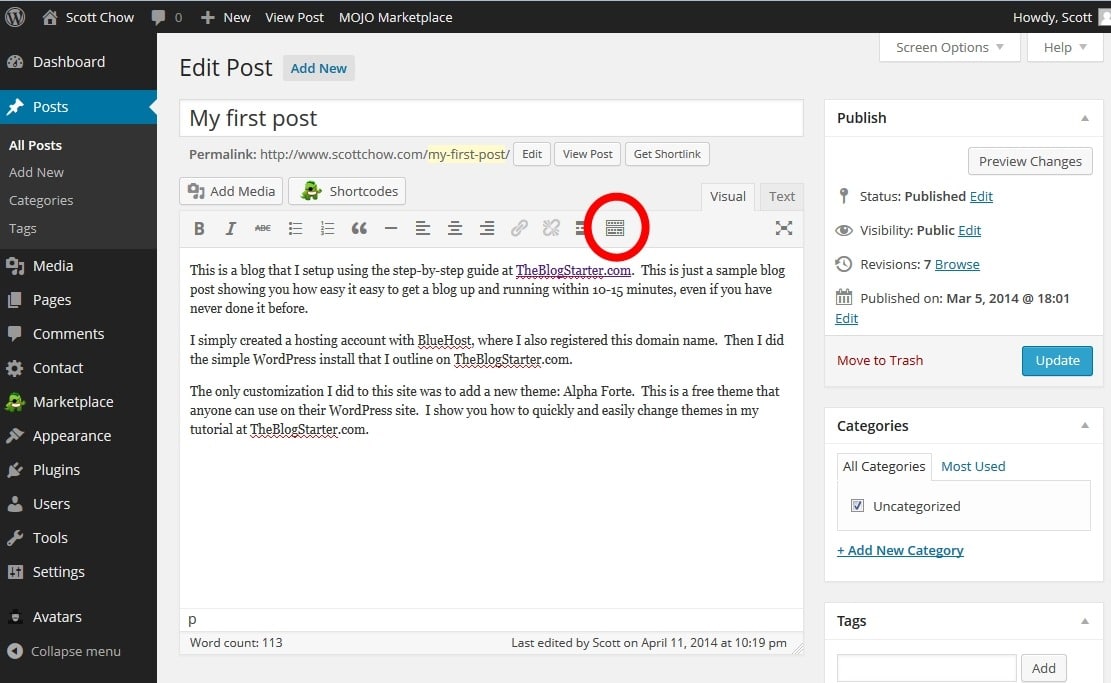
One of the OG CMS platforms is Wordpress, which came out in May 2003. According to W3Techs at the time of writing, 42.7% of websites are built with Wordpress... which is pretty nuts.
In any case, using Wordpress, you can create posts and pages (aka content), like so:

and then create your website using that content, like so:

So what's a Headless CMS 🤔?
A headless CMS is a content management system that separates the presentation layer (where content is presented) from the content layer (where content is stored and managed).
In other words, it's solely focused on making it easy to manage content; not (necessarily) the website.
Because headless CMS companies don't need to explicitly concern themselves with the visual layer, their product teams can focus solely on the content-editing experience. For example, it's difficult to create a custom data model using Wordpress; the only content types supported by default are pages and posts. By contrast, using a headless CMS, you can easily define whatever data type you desire.
Because headless CMSs are decoupled from the presentation layer, however, this means that they must be extremely easy to integrate with (otherwise no one could use them with their website). As such, headless CMS platforms typically come equipped with extremely performant and well-documented APIs... making them attractive to developers.

Going into this project, I'd already created this website using NextJS (presentation layer); I just needed a place to store the projects and blog posts (content layer). Hence, my need for a CMS of the headless variety.
Choosing a Headless CMS
Given that it's 2023, there's myriad headless CMS players out there... which one should I pick for lucmarrie.com 🤔?

Here's a few notable providers, as ranked on the G2 grid:
To be honest, I'd already heard of/used Contentful while working at Yext, so I went with them. However, in a future project, I will integrate with a few other providers and do a comparison.
Website Development
Headless CMS installation wasn't nearly as hard as I thought it'd be... the code updates more or less comprised of two steps:
- Migrate content to Contentful
- Data fetch the content at build time
Let's walk through each step:
Migrate to Contentful
Getting started with Contentful was extremely easy.
When you sign-up for an account, they give you the option to install some example content models... but personally I recommend starting from scratch.
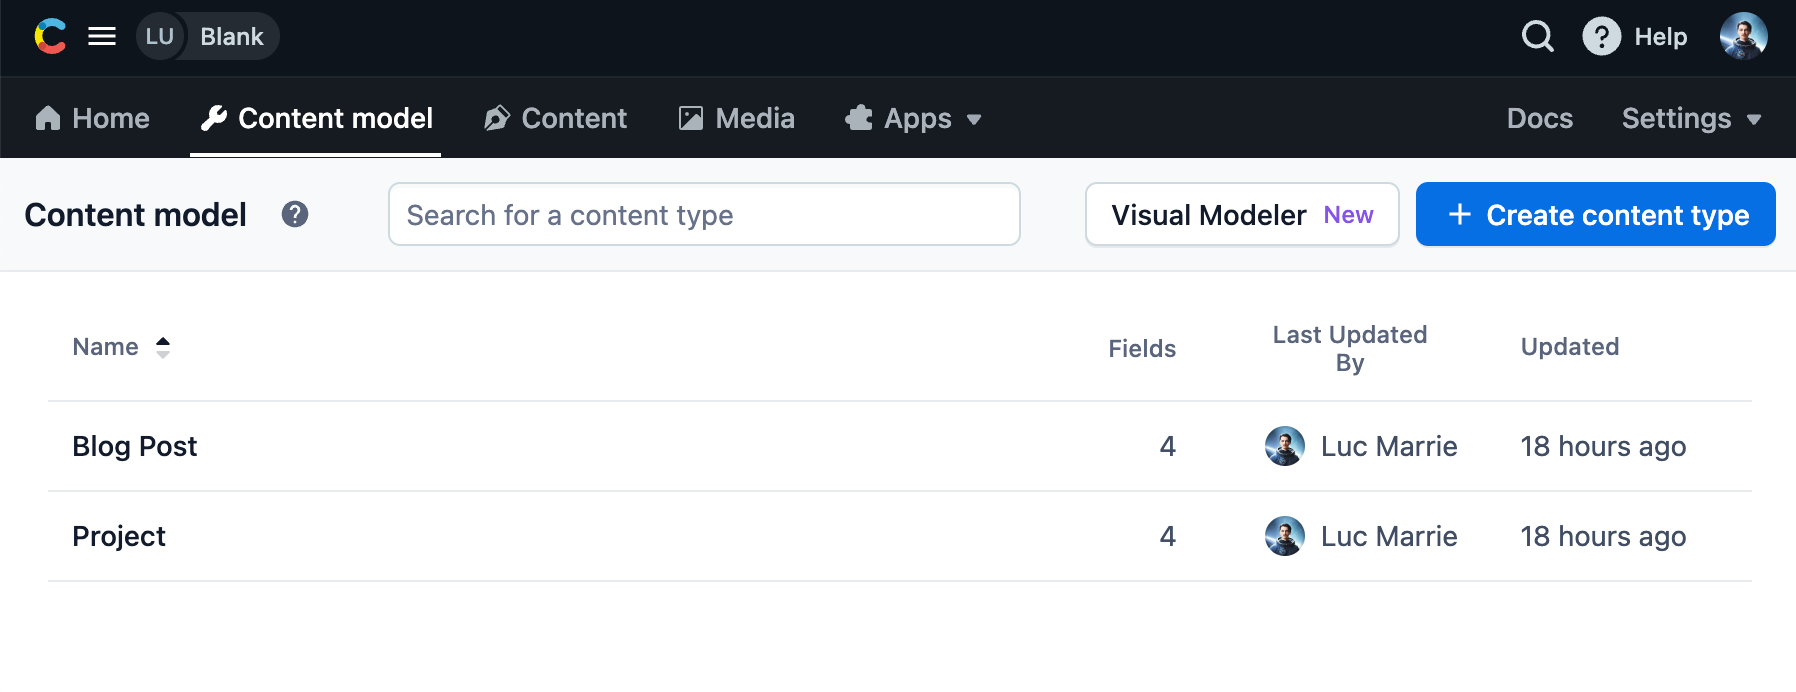
First, I needed to create two content types:
- Project
- Blog Post

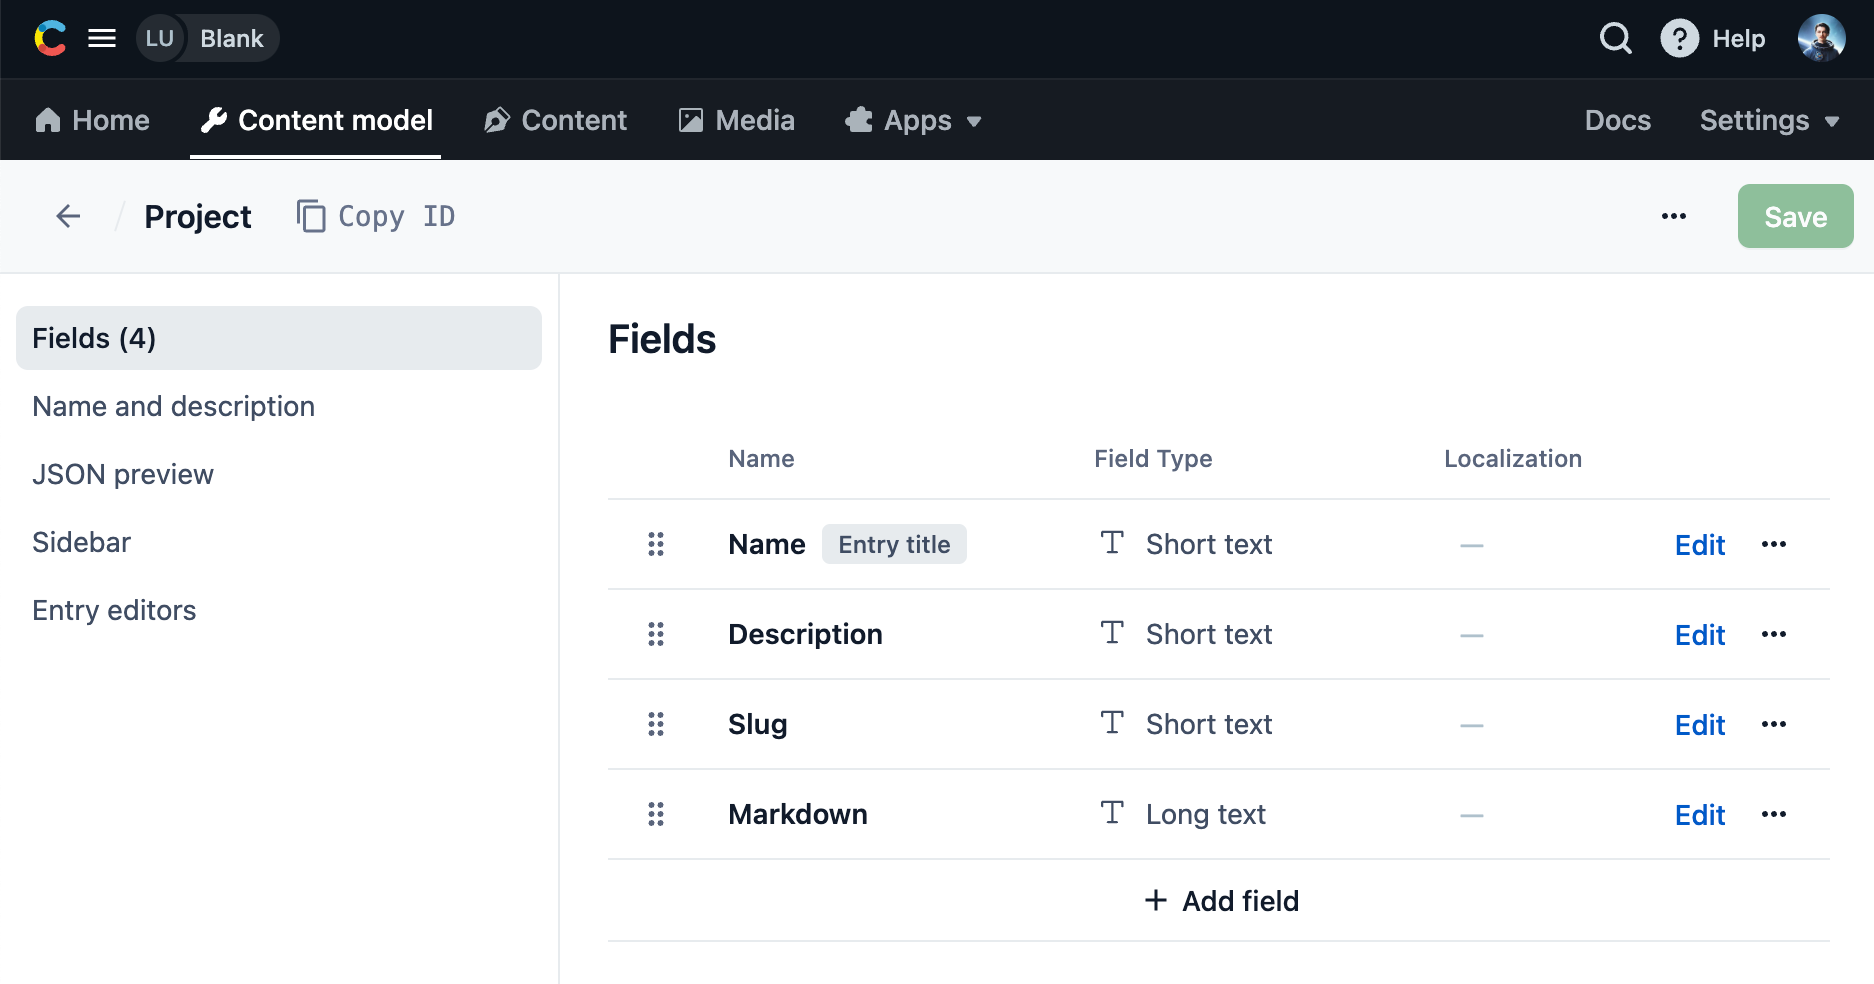
I configured each content type with the following field schema:
Name(short text)Description(short text)Slug(short text)Markdown(long text)

From there, all I had to do was migrate the markdown files from my repo into Contentful. I didn't notice any sort of spreadsheet uploader, so I just manually copy/pasted the markdown by hand. Thankfully, I only had 5 markdown files total... if I'd had tons, I would've had to use Contentful's CLI to blast them in programmatically. If anyone from Contentful ever reads this... might I suggest some sort of spreadsheet upload feature?
To conclude this section, there were a few features that I quite liked when content-modeling with Contentful:
- The
long textfield type has built-in support for Markdown editing. This may be table-stakes in the headless CMS world, but it sure as hell ain't in the standard CMS world.
- The
short textfield type allows you to auto-populate values for slugs; in my workspace, each slug auto-populates based on the project/blog post name
Data Fetching
With the content alive and well in its new CMS home, the next step was to ensure my front-end application knew how to fetch it.
To get started, I followed Contentful's JavaScript guide (clean documentation FTW). The game plan was simple:
- Set up the Contentful JavaScript Client
- Fetch the data
Set up the Contentful JavaScript Client
First, I downloaded the Contentful JavaScript library.
npm install contentful
From there, I created a utils/contentful.js file to initialize the client; like such:
require("dotenv").config();
const contentful = require("contentful");

const client = contentful.createClient({
  space: process.env.CONTENTFUL_SPACE_ID,
  accessToken: process.env.CONTENTFUL_ACCESS_TOKEN,
});

module.exports = client;
Client obtained.

Fetch the data
Next, for the highly-anticipated fetching.

To avoid unnecessary API requests to Contentful, I wanted to ensure that my project and blog content was only fetched once at build time; not client-side. I'm a frugal man, and don't want to blow through my Contentful free tier 🤷.
Thankfully, when using the App Router in Next.js, all components are rendered server-side by default. So all I had to do was add some API request logic to my home, project, and blog components.
Using the client from the previous step, I added a getEntries() function to my home page, which fetches projects and blogs from Contentful's Content Delivery API:
import client from "../utils/contentful";

async function getEntries() {
  try {
    const entries = await client.getEntries({
      order: ["-sys.createdAt"],
    });

    const projects:any = [];
    const blogPosts:any = [];

    entries.items.forEach((item) => {
      const fields = item.fields;
      if (item.sys.contentType.sys.id === 'project') {
        projects.push(fields);
      } else if (item.sys.contentType.sys.id === 'blogPost') {
        blogPosts.push(fields);
      }
    });

    return { projects, blogPosts };
  } catch (error) {
    console.error("Error fetching entries:", error);
    return { projects: [], blogPosts: [] };
  }
}
From there, I could simply map through the returned entries in my TSX, like so:
export default async function Page() {
  const { projects, blogPosts } = await getEntries();
  return (
    <>
      ... // truncated
           {projects.map((project) => (
                <div>
                  <Link
                    href={`/projects/${project.slug}`}
                    className="link"
                  >
                    {String(project.name)}
                  </Link>
                  <p>{String(project.description)}</p>
                </div>
            ))}
      ... // truncated
           {blogPosts.map((post) => (
                <div>
                  <Link
                    href={`/blog/${post.slug}`}
                    className="link"
                  >
                    {String(post.name)}
                  </Link>
                  <p>{String(post.description)}</p>
                </div>
            ))}
      ... // truncated
    </>
  )
}
In addition to the home page, I had to perform some minor surgery on my dynamic routes as well.
As a result of my markdown source, both my app/blog/[slug] and app/projects/[slug] components needed to be updated to handle markdown styling, since that was previously taken care of by Contentlayer transformations (shoutout to Lee Robinson). Without the Contentlayer transforms (refer to my code history 😔), my markdown styling no longer supported tables and code snippet syntax highlighting.
To fix this, I imported react-markdown (with the remark-gfm plugin enabled) and React Syntax Highlighter into my project... two extremely useful tools for rendering beautiful markdown.
import ReactMarkdown from 'react-markdown';
import remarkGfm from 'remark-gfm';
import {Prism as SyntaxHighlighter} from 'react-syntax-highlighter';

const MarkdownRenderer = ({ content }) => {
  return (
    <>
      <article className="prose prose-quoteless prose-neutral prose-invert">
          <ReactMarkdown
            remarkPlugins={[remarkGfm]}
            components={{
              code(props) {
                const {children, className, node, ...rest} = props
                const match = /language-(\w+)/.exec(className || '')
                return match ? (
                  <SyntaxHighlighter
                    {...rest}
                    PreTag="div"
                    children={String(children).replace(/\n$/, '')}
                    language={match[1]}
                    style={materialDark}
                  />
                ) : (
                  <code {...rest} className={className}>
                    {children}
                  </code>
                )
              }
            }}
          >
            {content}
          </ReactMarkdown>
      </article>
    </>
  );
};

export default async function Project({ params }) {
  const project = await getProject({ params });

  return (
    <section>
      <h1 className="font-semibold tracking-tighter max-w-[650px]">
        <Balancer>{JSON.stringify(project.name)}</Balancer>
      </h1>
      <MarkdownRenderer content={project.markdown} />
    </section>
  );
}
Closing Thoughts
Next.js and Contentful both helped me fall into a pit of success during this project. Both companies have very well thought-out products, along with crystal clear documentation and quick-start guides.
In particular, Next.js's server-side by default data fetching paradigm made it a breeze to fetch my content for build-time rendering.
Similarly, Contentful's approach to content modeling is incredibly straight-forward, and their onboarding guide helped me quickly obtain the Contentful environment variables necessary to hook up my workspace to the front-end application.
This project took me about 6 hours... but now I don't have to touch the code again to write new project and blog posts! ... that is, until I need to support paginated requests 😨.